How many times have you considered propagating the lovely angel wing begonia that has graced your patio from season to season?
The angel wing begonia (Begoniaceae) is a popular indoor plant with its large, speckled angel-wing-shaped leaves on succulent stalks. Angel wing begonias produce fragrant clusters of red, pink, orange, or salmon-colored blooms. The leaves of angel wing begonias are often speckled with ruffled or serrated edges, making the plant beautiful even when it is not in bloom. Angel wing begonia is easy to cultivate and propagate, and once established, it swiftly develops into a huge, showy plant.
Angel wing begonia may be grown outside if you live in a mild winter environment; otherwise, it’s recommended to keep it indoors, where it can reach heights of 6 feet.
Angel Wing Begonia
Begonias are a family of flowering plants, most of which are native to the tropical regions of North and South America. Particularly Brazilian perennial evergreen shrubs called angel wing begonias can be grown either outdoors in USDA zones 10 and 11 or indoors as houseplants.
They are a particular variety of cane begonia, which are distinguished by strong stems with outwardly pointing joints from which leaves and flowers emerge.
The striking, asymmetrical leaves of these lovely shrubs have an iconic shape similar to an angel’s wings, and they are well known for their beauty.
These leaves typically have a dark green exterior with a red or purple underside and a silver, cream, or white “polka dot” pattern.” Up to 6 inches long, these leaves can be found.
Angel wing begonias are known for being some of the more laid-back varieties of cane begonias, which are known for being relatively simple to care for. Here are some tips for providing your plant with the best care possible.
Preparation of Angel Wing Begonia Propagation
- 3- to 4-inch-deep pot
- Coarse sand (optional)
- Sphagnum peat moss
- Perlite or vermiculite (optional)
- Sharp knife
- Pencil or stick
- Rooting hormone (optional)
- Dowel sticks or coat-hanger wire
- Plastic wrap
- String or tape
- Toothpick
- Twist ties
- Artist brush (optional)
Tip:
Instead of plastic wrap, you can use a gallon-size resealable plastic bag to cover the pot.
Methods of Angel Wing Begonia Propagation
Stem Cuttings of Angel Wing Begonia Propagation
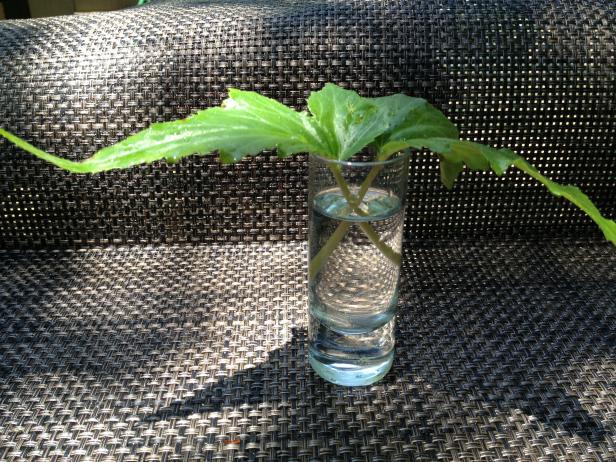
Stem cuttings are the simplest and most successful technique to propagate your angel wing begonia. This approach is best used in the spring when the plant is just starting to grow. What you’ll need to do is follow the steps below.
- Before propagation, fill a 3- to a 4-inch-deep container with coarse sand or a germination media that has drainage holes. Mix 1 part sphagnum peat moss with 3 parts vermiculite or perlite to construct your own rooting media. Thoroughly wet the rooting media. It may take some time for Sphagnum peat moss to absorb water and become regularly wet. Repeat waterings until the sphagnum peat is evenly saturated.
- Cut a stem and at least two leaves off a healthy angel wing begonia with a clean pair of household shears to propagate. The stem should be between 2 and 3 inches in length. Don’t try to root a stem from a fading or older leaf.
- Leaves from the bottom two-thirds of the stem should be removed. For photosynthesis and root growth, one leaf at the cutting’s tip or top section is sufficient when propagating angel wing begonia. If desired, dip the cutting in the rooting hormone and follow the manufacturer’s instructions. This isn’t required, although it aids in the effectiveness of rooted cuttings.
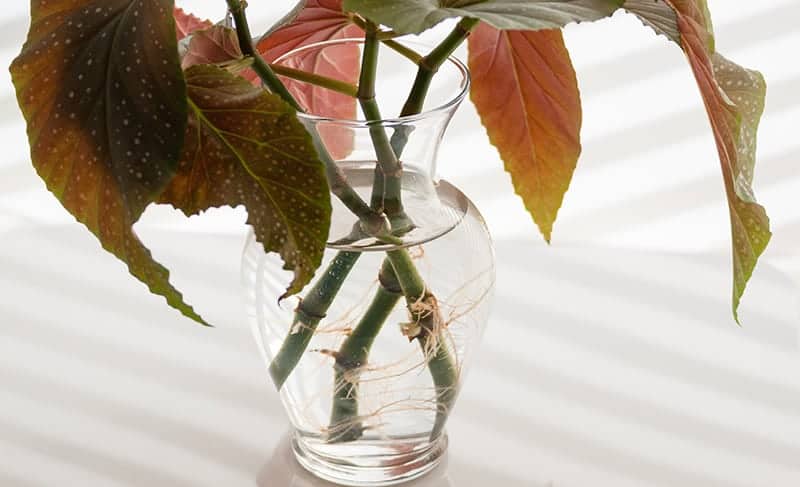
- Every other day, check the water. If the water is murky, carefully drain it out and replace it with new, room-temperature water. Angel wing begonias root fast, generally within one to two weeks. Allow the angel wing begonia leaf to stay in the water until the roots have grown to a length of at least one inch.
- Fill a planting container with commercial potting mix and the rooted stem. Angel wing begonias grow rapidly and have huge root systems, so the container should be deep and at least 8 to 10 inches wide. Otherwise, you’ll have to re-pot the angel wing begonia soon. Because the fleshy stems and roots will decay if there is too much moisture in the container, choose one with a drainage hole at the bottom.
- Place the planting container in a light that is both bright and indirect. After planting, give the earth a little watering. Between waterings, let the top of the soil dry out gradually.
- During the spring and summer, feed the angel wing begonia every other week with a liquid fertilizer for indoor plants. To make a weak solution, dilute the fertilizer to half the strength indicated on the bottle. When you observe growth slowing in the autumn, reduce fertilization to once a month and restart the regular plan in the early spring.
Angel Wing Begonia Propagation Tips:
- Lace the pot in a bright, out-of-the-sun location.
- Water the cuttings often enough that the growth media remains moist but not damp.
- Choose a container that has a drainage hole in the bottom, as the fleshy stems and roots will rot in too much moisture.
Division of Angel Wing Begonia Propagation
Before carrying out Angel Wing Begonia propagation, you could choose to pot the soil or water, depending on your preference.
- Remove the angel wing begonia from its container in late winter.
- Grasp a smaller plant’s root ball and pull the roots apart to separate groupings of canes. Make divides between clusters of canes by cutting through the root ball of a bigger plant using a sharp knife.
- In new potting soil, plant each division. Water the pots and lay them on a tray of damp gravel or marbles to keep the space surrounding the plants humid.
Air Layer of Angel Wing Begonia Propagation
- Cut a diagonal slice halfway through an old leggy cane between leaf stalks for propagation. To keep the cut open, insert a toothpick into it. If desired, dip an artist’s brush in rooting hormone and brush it on the open wound.
- Form a 4- to 6-inch damp sphagnum peat moss ball. Wrap the peat moss ball around the cane’s cut area. Wrap plastic wrap around the sphagnum moss. Twist ties are used to secure the plastic at the top and bottom of the ball.
- Untie a twist knot and irrigate the sphagnum moss to keep it wet while the cane roots, which takes four to six weeks. After you’ve finished watering, tie the plastic back up. Once Angel Wing Begonia roots form, cut the cane immediately below the cut spot. Fill a new pot with fresh dirt and plant your air-layered cutting.
By using either of these methods to propagate angel wing begonia, you will harvest larger plenty of new begonias last summer.
Angel Wing Begonia Plant Care
Temperature
Maintaining warmth is one of the most crucial aspects of healthy angel wing begonia growth. These plants prefer a consistent temperature between 65 and 72 degrees Fahrenheit. It won’t take long for your plant to die if the temperature falls below 50 degrees!
Keep your begonia far away from vent drafts, chilly doors or windows, as well as from heating vents and fireplaces. To promote development and flowering, maintain those temperatures as consistently as you can!
Light
Angel wing begonias require enough light to bloom, so make sure to give your plant lots of direct, bright sunlight. The best location for this is typically near a south- or west-facing window, or in an east-facing window, but far enough back so that the direct rays of the hot midday and afternoon sun won’t hit the leaves.
Avoid placing angel wing begonia leaves in direct sunlight as they will quickly scorch!
If you only have a north-facing window, it’s likely not enough light for these plants to flower, but you can always add a grow light to make up the difference. For the perfect balance of light and aesthetic appeal, we love these bulbs that you can just plug into regular light fixtures.
Although light is essential for these plants to bloom, a north-facing window or even some partial shade can work wonders if you’re after greenery rather than necessarily flowers.
Humidity
These vegetation adore humidity! Because angel wing begonias are tropical plants, humidity is crucial to maintaining their delicate leaves’ softness and suppleness.
Keep your plant in a steamy room like the bathroom or kitchen, or place a humidifier close to it if you live in a dry climate.
If your plant is small, another excellent choice is a humidity tray. These can be bought in stores or online, or you can make your own by setting your plant, pot, and all, on top of a shallow tray that has been filled with water and pebbles.
Just make sure the roots don’t come in contact with the water. More humidity will be produced around the leaves of your plant as the water evaporation continues.
Soil And Potting
Put your angel wing begonia in a rich, peaty soil mixture. It works well to use an indoor potting mix with a few handfuls of peat moss and some perlite. For additional nutrition, you could also include a little compost. Pick a potting mix with a neutral pH level of about 7 whether you buy it in a bag or make it from scratch.
Choose a pot with drainage holes to let excess water runoff, and make sure the size is just a hair larger than the root ball of your plant. Due to its ability to absorb some additional moisture from the soil, terracotta makes a great container for angel wing begonias.
With such rich soil, it can be challenging to achieve the ideal moisture balance, but this helps!
Watering
Evenly moist (but not soggy) soil is preferred by angel wing begonias. When the top inch of soil feels dry to the touch or when a moisture meter reads 4, water your plant.
Fertilizer
Use a balanced, gentle liquid fertilizer like Indoor Plant Food to fertilize your plant on a regular basis. To promote growth and blooming throughout the growing season, we suggest using Indoor Plant Food with each watering.
Flowering
The best way to promote blooming is to first take good, regular care of the plant. Make sure your plant receives enough water, humidity, light, and nutrients, and maintain a high level of humidity!
Pruning Angel Wing Begonia
Maintaining the health and growth of your angel wing begonia requires regular pruning.
So that your plant’s energy can be directed toward strong new growth, be sure to prune away any dead or dying stems or leaves.
Additionally, it’s crucial to “deadhead” (also known as pruning off dead or dying flowers) in order to encourage the plant to produce more blossoms.
If your plant is growing leggy and you want it to produce more, closer-spaced leaves, pruning can also help it become bushier. In order to promote more branching and leaf growth, trim the branches just above a node.
In order to encourage the plant to branch out in that area, you can also pinch off the ends of growing stems!
Conclusion
There are three ways to propagate Angel Wing Begonia. You just follow the explanation step by step. By using either of these methods to propagate angel wing begonia, you will harvest larger plenty of new begonias last summer.
If you wanna other plant propagation methods, please click other posts.
Happy gardening!